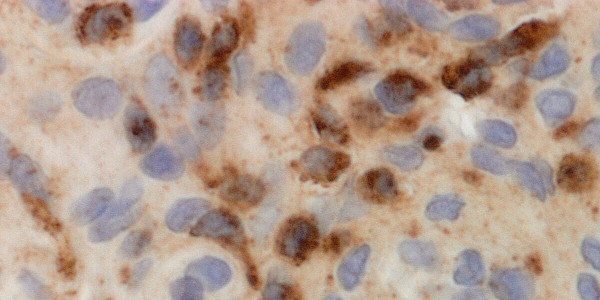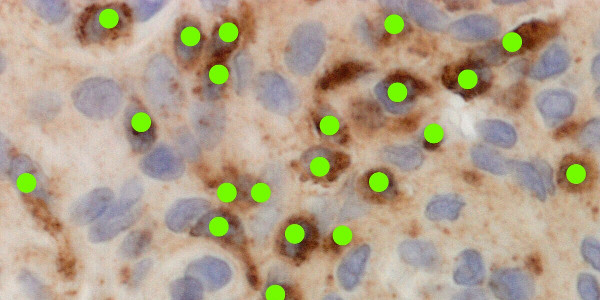
Ever lost count of your cells at number 152?
Never again with CellCounter.science. Now you can count your cells in a rapid, reproducible, and auditable manner.
Follow these simple steps to count your cells:
In the Lab
Step 1.
Take a photo of your cells.

Step 2.
Use any image editing software to mark the cells to be counted in a contrasting colour.

On CellCounter.science
Step 3.
Load your pre-marked image file (JPG format).
Step 4.
Identify your marker colour.
Step 5.
Review to ensure all marks have been counted. Adjust threshold settings if needed.
Step 6.
Save your results. The cell count, counted marks, and threshold settings will be included in the image.

Still got questions? Take a look at the help page for more details.
Help
Have you ever lost count while counting cells and had to start again? Do you want to ensure accurate cell counts with a minimum of time invested? CellCounter.science was built to solve these problems by allowing you to count your cells in a rapid, reproducible, and auditable manner.
CellCounter.science uses computer vision algorithms to detect colours and then allows you to save the results as an image with the cell count, counted marks, and detection settings included. CellCounter.science is built on top of the excellent tracking.js library.
How do I use CellCounter.science?In the Lab
Step 1.
Take a photo of the cells you want to count.

Step 2.
Use any image editing software to mark the cells to be counted in a contrasting colour (eg. if the cells are stained purple then use bright green) and save in JPG format. Make sure that your marks don't touch as overlapping marks will most likely be counted as a single mark. If you want to count multiple different cell types in one image then use different colours to mark each type.

On CellCounter.science
Step 3.
Click the 'Browse For Image' button to load your pre-marked image file (JPG format).
Step 4.
Identify your marker colour by clicking the 'Pick From Image' button and then clicking one of the markers in the image to select that colour. Alternatively you can select from a colour wheel by clicking the 'Marker colour' input.
Step 5.
Review the detected marks to ensure all cells have been counted. If your image is larger than your monitor make sure to scroll down and the right to check the whole image. Boxes will be drawn around all counted marks, and the cell count will be displayed in the top left corner of your image. Adjust the threshold and minimum size settings if needed to ensure all marked cells are included in the count. Whenever you adjust any settings the cell count will recalculated automatically.
Step 6.
Click the 'Save Image' button to save your results. The counted marks with boxes drawn around them will be included, and the cell count and detection settings will be superimposed in the top left corner of the image.

Input
Browse For Image
Browse for and select a JPG image file from your computer to load into the cell counter.
Colour
Marker Colour
Use a colour picker to select the colour be identified and counted in your image. Usually it is easier to use the Pick From Image button to select a colour directly from your image.
Pick From Image
Click on your image to select the marker colour. When a colour is picked the Marker Colour field will be updated with that colour.
Settings
Colour Threshold
Adjust the threshold used when finding the marker colour in your image. Set the threshold higher for less strict colour matching, and lower for more strict colour matching.
Minimum Size
Adjust the minimum size of a mark that will be included in the counter. Set the minimum size lower to include smaller marks, and higher to exclude smaller marks.
Output
Box Colour
Use a colour picker to select the colour that will be used for the boxes that are drawn around marks.
Save Image
Save the result image to your computer as a JPG file. The image will have boxes drawn around all counted marks, and the cell count and detection settings will be superimposed in the top left corner.
Help Links
Show/Hide Tips
Show or hide the tip text under each control field.
Hide/Show Help
Show or hide the help page.
Home Page
Show the home page.
No, CellCounter.science does not sent any of your data to the server. To verify this you can do the following:
- Load https://cellcounter.science.
- Disconnect your computer from the network.
- Select a file from your computer for processing, detect marks, and save your results.
You will be able to use all features of CellCounter.science while disconnected from the network.
If two or marks are touching then they will have a single box drawn around them and be counted as a single mark.
If the box drawn around a mark is surrounded by the box drawn around a nearby mark, then these two boxes will be merged and counted as a single mark. This should not occur if you use circular marks, however, it may happen if you use strokes instead of circles.
If the box drawn around a mark touches or overlaps the box drawn around a nearby mark, but is not completely surrounded by the neighbouring box, then the boxes will not be merged and each mark will be counted separately.
The values you enter in the control fields (eg. colours, threshold etc) will be stored in your browser and will be used automatically the next time you visit CellCounter.science.
If you find that clicking the Save Image button in Safari opens the results image in a separate browser tab instead of saving it, then please right click on the results image and select the save option to save a copy to your computer. This appears to be a limitation of Safari and we have not been able to work around it.
If you would like to enquire about running your own installation of CellCounter.science please get in touch at hello@cellcounter.science.
If you have other questions please feel free to email at hello@cellcounter.science.